This is a bit of a dirty workround and was inspired by YOGYOG's alpha tutorials for eeVee.
This workround works by rendering in both Cycles and eeVee and using the vector and depth passes from cycles in the compositor to add motion blur to the eeVee render.
This may sound like a long process but if you turn everything down to the minimum in Cycles the cycles part of the render does not take too long. (though if anyone knows how to make it faster I'd be very glad to hear from you.
So STAGE ONE
Having created your scene in eeVee you need to duplicate it
and use 'Link Objects'
We will now have two scenes in the Outliner, which we can rename 'eeVee' and 'Cycles'
STAGE TWO
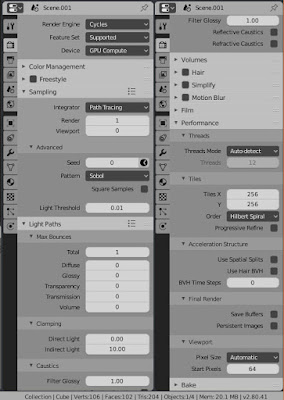
Select the 'Cycles' scene and we need to make the cycles pass as fast as possible and include the Vector Pass.
Turn everything down to as low as possible even if you don't understand what it does to make Cycles render a quick as possible.
Select the Vector pass and the depth pass and turn everything else off or low.
STAGE THREE
In the Compositor, using render layers, select the Image from the eeVee scene and the Depth and Vector from the into the Vector Blur node.
And Voila!!
Vector motion blur
Current problems.
1) you must have the Cycles scene selected in Blender or you will just get the eeVee render without motion blur for some reason. (I guess the cycles doesn't render)
2) Blender crashes if you try to change the dimensions of one of the scenes and try and render it.


No comments:
Post a Comment