Thursday, 22 February 2018

Coaxial SPDIF digital audio to USB (on the cheap) for the Yamaha SW1000XG


Having got the SW1000XG working in its new fanless case it seemed a shame that I could not make use of the digital audio out the card offers. Computers used to offer SPDIF in but it seems to have gone out of fashion. A cursory search on the web revealed only very expensive solutions until I hit upon a cheap device containing a CM6206 chip. A search on eBay for CM6206 in the description revealed a number of devices – cheap USB sound cards which included SPDIF in. I bought one for £8.79. It can only do 2 channel audio through SPDIF but that’s fine.

As the SPDIF input was optical I also bought a coax to optical converter... or so I thought.. In fact I bought an optical to coax converter by mistake.

Not to be defeated I was inspired by this article where someone simply connected a red LED to the coaxial output via a resistor an shoved it in the optical in.


I did not have an LED! But as I was not using the SPDIF optical out on the USB device I though I might be able to hijack the transmitting LED. I cut the track and connected the Coax to the input... It didn’t work..

SO then I thought I’d connect the coax in place of the optical input. I unsoldered the optical receiver... unfortunately destroying it in the process.. but the amazing thing was...

..............IT WORKED!!!


I won’t go into how I managed to mangle the front cover but needless to say patience was not the watch word of this project..


So –Initially it worked. I recorded the output of the SW1000XG into Audacity via the SPDIF interface.. and fine... no problems at all.

I thought I’d try it with a DAW.. Loads of problems, loads of distortion.
It seems it does not like ASIO drivers. Best results in terms of latency came from using WASAPI drivers but there was some glitching. Normal windows drivers worked fine but the latency was terrible. 

So in the end I decided to stick with the analogue out from the SW1000XG for creating and the digital out for final mixdown. The analogue outputs are good but there is some noise which is not present in the digital out.

Finally a word of warning. The USB audio box is a bit temperamental. If you put the usb out the computer will Blue Screen of Death. The USB box can get locked up and rebooting the computer wont fix it – you have to depower the USB box.

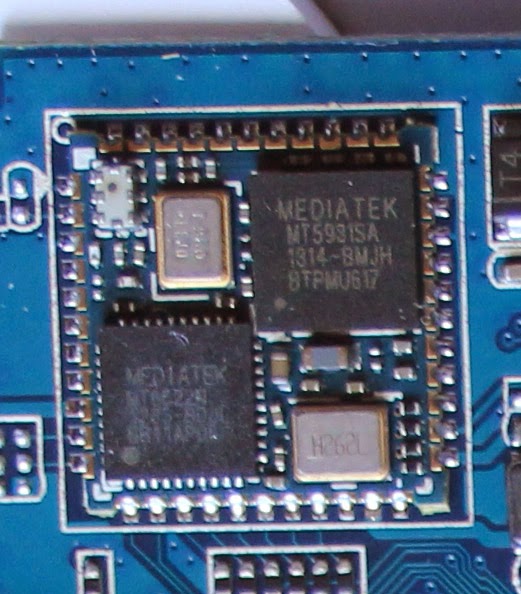
PS. You can and an LED to the box to show it's on. There is a place on the circuit board here


Sunday, 11 February 2018

Using the Yamaha SW1000XG with a 64bit Windows operating system


Well first of all you can’t.. you just can’t.. So here's what I tried to get round this and what worked and what didn’t

Using a 32 bit operating system in Virtualbox using PCI passthrough.
A number of web threads allude to this... but it doesn’t work.
PCI passthrough, the ability to pass a piece of hardware to an operating system running in VirtualBox (usually a graphics card for gaming) only works with a Linux HOST operating system. IE: you have to  have Linux as your main operating system on the computer.. which for me was a bit of a deal breaker. ( and also it only works sometimes as it’s experimental )

Having the SW1000XG in and external, old computer controlling over midi.
This of course worked (in that I could use the midi synths not the audio side). Problem was that though I had spent loads of time and money making my main PC quiet, I wasn’t going to do the same for this second, old PC which turned out to be rather noisy in comparison.

So

I bought a old fanless thin client with a  PCI slot on ebay.


£40 bought me a 10ZiG 67xx thin client with a 2GB “Disk on board” SSD drive. 2GB is just enough to install XP, it came with an embedded version (which I stupidly blew away before writing down what drivers it had).The unit sports a single PCI slot just big enough for the Yamaha card.

It was not easy to find the correct drivers for the motherboard so I tried installing the SW1000XG card without them (as the computer worked enough for me as it was). The computer more or less hung and was unusable.

Finding the correct drivers solved this. This was not easy to do as I could not find the motherboard name. I used two methods: One was to use Google images to find similar boards and it turned out to be very similar to a ITX-EMV9X62A. The other tool I used was HWINFO32 which lets you see what is attached to the bus: even then I had to download a number of drivers to get the right ones. Available at https://www.hwinfo.com/ After this the Yamaha drivers worked fine.

                                                Here's what worked for me


When fitting the PCI card, despite the fact a previous card that came with it had worked fine, I put some insulating tape on the heatsink as I felt there was a danger of shorting on the back or the Yamaha board. It really is a snug fit. 

The result is a small, silent, Yamaha synth module with over a thousand voices. It does not have a monitor or keyboard fitted and runs TightVNC server so it can be operated from the main computer.
The SW1000XG needs some configuring to allow the synths to see the midi and you can do this by either running MidiOX to connect SW1000 midi in to SW1000synth#1 or you can install XGedit95.
XGedit95 gives much more control over the synths but it is possible to install it on the Main Computer side and use it from there.


Here I found a problem with my cheap ebay unbranded usb midi converter not passing System Exclusive messages for the XG voices from XGedit95 so bought a M-Audio Midisport 1x1 which passed these messages successfully and so allowed the use of XGedit on the host computer. It seems that you don’t need to do this using system exclusive messages, there are voice files for the SW1000XG which do it purely with Bank and Controller changes so it’s not completely necessary.

Looking to the future. You can replace the Disk on Board with a larger complact flash card using an adapter from China. Not tried this yet but with 16GB you could install windows 7 and have a protection from viruses. There is also an SATA socket but I’m not sure there is enough room for a drive with the card in place. As it was, I gave XP a static IP address and put bad values in for Gateway and Nameservers so it can’t see the internet. It seems happy.

A month later....

Decided it was getting a little hot.. CPU was at 50 degrees and some of the componets on the SW1000XG lie directly on the heat sink... so added a fan.. very handsome


Friday, 31 July 2015

Windows 10 - can I make it a bit like XP?

Everytime Microsoft releases a new operating system version my heart sinks: will it muck up my way of working? will my software work? will I have to throw away all my peripherals? Will I have to learn new ways of doing things or find work rounds for no particular good reason?

And so as Windows 10 arrives I am thinking - how late to do I leave it to upgrade so they can iron out all the bugs and remove the stupid 'features' and do I have to upgrade anyway, what will happen if I don't.

So I decided to upgrade one of my render machines to check it out. The box has no mouse or keyboard or monitor and I control it remotely over VNC.

I followed the instructions here: http://www.cnet.com/how-to/jump-the-line-and-get-windows-10-right-now/

Virtually all of the upgrade process and questions happen after all the relevant software has been downloaded and before the computer reboots. The computer said it wanted to restart, I said yes and I went down the pub. When I came back new windows 10 was finishing preparing and everything was still visible through VNC. Sat in the pub I was really worried I would have to drag a monitor etc out and save the computer from an installation hell but it was not the case.TightVNC is working fine as the new Windows 10 starts without me doing anything.. which is marvelous!

The only thing I did need to do was sort out the graphics driver for the Nvidia GT560ti. Blender reported there was no 3D graphics card installed. I ran the Nvidia Experience, it downloaded a new Windows 10 driver and everything was fine. I guess this is how they have sorted out the Nvidia driver update conflict that happened to a lot of people on release date.

Using Windows 10.
I used the new Start Menu for about 3 minutes before installing Classic Shell. The new start menu is geared towards what Microsoft wants you to use so best get rid of it. The Classic shell menu looks a bit ugly and it was then that I realised that WIndows 10 has lost a lot of the nice refinements like Aero that made earlier versions look sexy. Playing with settings and themes improved things a bit.

You can remove the Search bar from the task bar by right clicking and selecting Search/Hidden.

You can install the Quick Launch Bar :D the same way as with Windows 8.

Settings is a similar mess as was with Windows 8 and to be honest I am not sure how you get to a lot of the old Control Panel panes like Device Manager without Classic Shell. There is access to the 'new settings' via the Notification bubble.

All in all its OK but the GUI does look a bit like a slimmed down version of Linux in terms of polish.

I shall not upgrade my other computers until I need to but at least I know I can make it a bit like XP :)

Saturday, 22 March 2014

HX8-C Android TV Quad Core Rockchip Wi-Fi FIX

One of the problems I found with this device was that the Wi-Fi seemed very unreliable where I wanted to position the device. I opened it up and found that the antenna is at the opposite corner of the box from where it needs to connect to inside: so the wire that connects it crosses diagonally the board hugging all the chips.

I thought maybe this was a bad idea; that all then electrical interference from the various circuitry would affect the signal - so the signal strength might look good, but the error rate due to the interference would be high.

(Warning what follows will void your warranty and possibly destroy your device - I take no responsibity)
So I decided to void the warranty. I cut the wire, removed the antenna and drilled a new hole in the right hand side for it to go in. I resoldered a much shorter length of wire back on to the board (be very careful here) and put it back together.
Not perfect but not bad and only took a few minutes. I watched a whole hour of iPlayer and only one minor glitch. Much better than before. Youtube worked fine and sounded good through the optical output.

Decided it could be improved and modified what I saw here.

I stuck the black antenna casing back over the top having removed the sleeving inside it. Seems to be a little better than last time. Device is still only connecting at between 11mbps and 18mbps but the connection seems to be solid.


Thursday, 20 March 2014

HX8-C Android TV Quad Core Rockchip etc etc.. How to switch it on and other things

I don't watch a lot of telly so when I finally weakened and spent just over £60 on this Android TV box it was much more about mucking about with android than watching anything.

The device is quite attractive and very small, has 4 USB ports (one OTG), HDMI, Optical Audio and an AV socket (which has a red, green and blue phones - which implies to me its component rather than composite and audio. Haven't tried it yet.) A webcam, microphone, external antenna for WiFi, Bluetooth and an infrared remote control.

The is no 'ON' button which poses the first problem; switching it on. Out of the box the device does nothing and even crashed my iiyama monitor. In the end the combination of unplugging and replugging the HDMI and then pressing the tiny reset button with a pen brought it to life (you'll get use to this). Once on, you can put the device to sleep with the 'power' button on the remote. The remote control is next to useless for operating the device and also seems to have the same codes as my DVD player.

I have a Sky Now TV box to compare it with which cost £10. It is a restricted Roku box but you can sideload Youtube which works well. So I have this to compare the HX8-C with. To be honest I haven't been that impressed with the video. The quality of video is not wonderful - in clarity and smoothness its not as good as the Roku. It does on the other hand handle the android side of things well. Wi-Fi is a bit flaky despite the internal antenna and seemed to be dropping to 11mbps despite showing good signal strength.

I decided to see what I could do in terms of rooting, recovery options, custom roms and dual booting.
The HX8-C appears to be the same as the CR11s and the CS968 and there is quite a lot for these devices.

ROOTING OR INSTALLING CUSTOM ROMS MAY RENDER YOU DEVICE USELESS.  You perform these operations at your own risk and I take no responsibility for what happens.

Firstly you need to install the Rockchip drivers on your PC and the easiest way is to use the RK_DriverAssistant available with instructions here.

To root the device with windows I used the instructions here. To use the OTG USB port for this purpose you have to set USB DEBUGGING in Developer Options and then under USB check the 'Connect to PC'. As you run the TPSparkyRoot.Bat, each time your HX8-C reboots you will have to recheck the USB/Connect to PC checkbox.

Root is not necessarily permenant. That is because the devices recovery system rewrites it if anything goes wrong. I tried to instal ClockWorkMod - it failed and root was lost as the device repaired itself.

I installed a Reboot app as the device only has the option to Power off and removing the HDMI and pressing the reset button to get it back on again becomes tiring. I then downloaded Nandroid Backup and backed up in both CWM and TWRP, copied them to my PC, in case of problems later.

Opening the device up - top view
Underneath view
The wifi chipset is Mediatek MT5931 / MT6622 bluetooth
This indicates that the box is similar to the CS968 v3 but the board number is HTC-T018-V4 so it is obviously the latest version. Unfortunately most of the custom roms and the Linuxium dual boot are for the CS968 v2 which uses the AP6210 wifi chip. Use those roms here and you will have no wifi/bluetooth.


That's all for now.. write some more later.


Friday, 1 November 2013

How to get rid of the Get Started help stickers in Windows 8.1

The upgrade to 8.1 has been very disappointing. Quite how they managed to pack so little into the 3.5GB download I don't know; I'm sure all of the changes could have been accomplished with a small patch.

Never the less having done it, and using the fabulous Classic Shell V4.x no harm has been done... except...

Although I steer clear of the Metro interface I do use the Calendar and Contacts apps occasionally for convenience - even though they are not very good. Sadly since the upgrade they have been blighted with helpful 'stickers' which won't go away until you have proved you have understood them by doing what they say and even more sadly, its impossible to do some of the things without a touch screen. The result is valuable screen space is hogged by these annoying messages and there is not much you can do about it.

I managed to find a cure on a helpful web page and it involves using the registry editor so - WARNING- YOU COULD DAMAGE YOUR COMPUTER - if you are not happy doing that best buy a touch screen.

Launch your favourite registry editor.

go to HKEY_CURRENT_USER\Software\Policies\Microsoft\Windows

in the edit menu do 'New Key' and name it 'EdgeUI'

go into this new key you have created and in the edit menu do 'New 32bit D-word'

name it DisableHelpSticker and give it a value of 1

reboot and there your go.

If you feel unhappy with any of the above don't go ahead. you can break your computer with the registry editor.

Monday, 21 October 2013

Windows 8.1 update fails 0xC1900101 0x40017

Apparently its the second number that gives the detail - 0xC1900101 means it didn't work and 0x40017 is why - if you have the secret code book.

There is a lot of documentation suggesting Nvidia drivers should be up to date as only the most recent support 8.1.

But that didn't work for me - after two failed attempts I removed my gaming mouse SteelSeries software (forget which website suggested it) and all was well and it updated in about an hour.

One final tip. If you have a failed attempt it does not download the whole 3.5Gb again. If you go to the app store and click download 8.1 it skips the download part and then gets on with it.

Its very difficult to imagine whats in the 3.5Gb of download: 'My Computer' is now called 'This PC' and SkyDrive is slightly more integrated than before. Apparently the metro interface is better but I could not see any difference. And with Classic Shell v4.1 you can now turn off seeing 'apps' in the Start Menu so you can almost completely forget your using windows 8 :)