Tuesday 16 May 2023

Washing machine doorseals and paraffin based skin creams (Epiderm and 50/50)

a Bosch machine after a couple of months.


If you are unlucky enough to be, or care for, someone who has a skin condition requiring the daily use of Epiderm, or what is called 50/50 (50% paraffin, 50% paraffin grease) you will know about the problems with washing machines.

 You will also know there is next to no information or knowledge available. The nearest I have found is message posts from people who work in garages and have to wash oily clothes. Whether it is oil or Epiderm, you will know that your washing machine doorseal starts to rot very quickly.

I care for someone with a form of Lymphoma called Mycosis Fungoides or Sjogren's syndrome. It's rare and causes the protective layer of the skin to be compromised. She uses a lot of 50/50 so has a lot of old duvet covers on the chair she uses and on her bed, and so has a collossal amount of washing to do. The 50/50 clogs up the drains so she has to do a daily boil wash, as that is the only thing that will clear it through. It also means her son's clothes aren't covered in grease when they are washed. Clothes and sheets have to be clean to prevent skin infection.

a Beko machine after a few weeks


In the past I think we have been sort of lucky in a way. She has had this condition for over 8 years. The first washing machine was a Bosch Lumixx 8, a lovely machine. The door seal started going and leaking after her using 50/50 for about 6 months. I replaced it, with a lot of swearing, having accidently bought a black doorseal meant for a  black of Silver machine by accident. It lasted the rest of the life of the machine.

The next two machines were Bosch Serie 6 machines. I must admit I never liked them, they seemed to leap around a lot. On both machines the doorseals failed within 6 months, a Bosch engineer duly came and replaced them with .... a black door seal, which lasted the life of the machine. I don't beleive there was an extra charge.

The second of these was beginning to fall apart (they get a lot of use) so I suggested we try a Beko. I and others had good experience with them. We bought one from John Lewis, the doorseal lasted about two weeks. After a lot of negociations we got our money back and they took it away. This took about a month.

Did you know if a washing machine fails in the first month, the manufacturer will not fix it, and the person who sold it to you has to refund you or give you a replacement? Don't expect it to be easy.

So then I went to a local independent seller of white goods in Southampton. I explained my problem and that paraffin products were being used. He put on a display showing that he could tell the machines with a superior doorseal - he could tell by feel. He also said my theory about black doorseals was wrong. So I bought a Bosch Serie 4  9Kg from him.

A little unrelated to this thread but a week later this machine filled the kitchen with smoke and my friend had to call the firebrigade, who removed the machine from the flat. After some negotiation we got a replacement machine.

Two months later the doorseal had signs of going wobbly (see the above photo). I contacted the shop where we bought it and he said that you could fit a Serie 8 door seal to it, as they were better quality (this wasn't, it turned out, true) and we had to contact Bosch.

I did some investigating and from visiting a car maintenance forum I learned that Bosch do two types of doorseal. A normal one at about £50 and a grease resistant one for £120. no mention of colour sadly. 

The Bosch engineer turned up today and said the purveyor of washing machines in Shirley Road Southampton should not have said what they did when they sold us the machine. He would return with a grease resistant doorseal next week but we would have to pay £120 for it, labour would be free.

So the moral of this story is:

1. do not trust anyone who sells washing machines to know how to help you. You'd be better off going into your local garage and ask them what they do. If someone promises you something - get it in writing.

2. Do not buy a machine, expensive or cheap, unless you have physical proof that there is a grease resistant doorseal available for it. Get one fitted when the first one fails and hopefully you won't have to pay for the labour. Bosch have a good part system for looking at parts

https://www.bosch-home.co.uk/supportdetail/product/WAV28MH4GB/01#/Tabs=section-spareparts/Togglebox=tb0221/Togglebox=tb0313/

If you look down the page at item 0313 you will find there are two boot gaskets listed, one more expensive one is described as grease resistant. (this is for one type of machine - you will have to start a new search for the one you are buying).

3. Don't expect any customer service from anyone.

I will update this page when it's fitted and run for a while. In the meantime if you have to deal with this as a sufferer or a carer, I wish you like and hope that this potted history helps you.

Thursday 16 June 2022

Drayton Wiser OpenTherm of Baxi 600 combi boiler - Does it Work?! Hot water UPDATE!!

 I'm writing this because it was very difficult to find anything concrete about whether boilers were fully compatable with Drayton's implementation of OpenTherm.

There were many posts, with some replies from people who where guessing, that there were problems with Draytons implementation of OpenTherm. Other threads stopped abruptly when it appeared the author had solved the problem... without any details of what had happened.

I have been using the Wiser system with a Worcestor Bosch combi using relay control and it has been good. It may only be a one bedroom flat but its an old rambling building and I currently have 4 Wiser Radiator thermostats and two room thermostats. Finally the flat is a fairly consistent temperature.

I have had problems with the Drayton Wiser Hub. The system kept on being unavailable. This was finally solved using a £12 wifi extender from Argos. Even though the wifi signal was at about a half according to the diagnostics on the app, it obviously wasn't working properly. It didn't just not work, very weird things happened when trying to get it to work. After the wifi extender, which is sited quite near it, I have had no problems at all. Coverage to all the peripheral has been pretty good with one living room radiator thermostat dropping out occasionally. Then it reconnects again.

I was having the boiler moved and decided to replace the aging Worcester with a Baxi 624 combi which, a message board suggested, should work with Drayton's OpenTherm. There were reports that there were  problems with domestic hot water (DHW) as the Baxi expects DHW temperature messages and the Wiser does not supply them. By the law of OpenTherm you do not need to send them, but the Baxi controllers do so it expects them.

The proliferation of 3rd party controllers for boilers has meant people like me tinkering with heating systems which they would never have been interested in before. It also means that people are asking Boiler Installers to install boilers with controllers where there is no proof they will be compatible. I have a deal with my installer that we will go back to relay closure if the opentherm proves problematic.

When using opentherm the controller takes over the workings of the boiler, so there is lots of scope for things going wrong.

My installer has done a sterling job of moving the boiler, which has included running pipes in a difficult route. The controller has been resited in the centre of the flat and the opentherm cable run to the boiler is just under 20 metres.

So the first thing I found was that once a Wise Hub has connected as OpenTherm, you are stuck with it. If OpenTherm is disconnected you can not then control the boiler using the relay. Apparently there used to be a selection and a status for type of connection in the App but they are no longer there. I put an inline switch in the opentherm cable so I could disconnect OpenTherm at will.

With it all up an running the hot water seems to be running at 60 degrees. If you turn the hot water knob on the boiler the value appears but you can not change it. The control has been over-ridden by OpenTherm. Sadly, as the Wiser does not send hot water temperature information you are stuck with 60 degrees. I did try powering up the boiler with OpenTherm disconnected, changing the tempurature to 40, and then connecting the opentherm. It immediately goes back to 60. 60 - 65 is recommended by Baxi to stop things growing in the pipes.

So there you go. There are two possible ways of adding control to the hotwater. One is to enter the world of Jiří Praus and his OpenTherm gateway Arduino Shield. You may need a degree in computer science and then you can insert the hotwater messages into the Wiser opentherm data stream. The device is here https://www.tindie.com/products/jiripraus/opentherm-gateway-arduino-shield/ 

The second possible way comes from a post I saw saying it has been known to work to add a two way switch in the OpenTherm cable and switch to a thermostat that can control domestic hot water. I found one, the EPH CP4M but have not tried it. 

Finally, really it would be good if Drayton could add the DHW functionallity to the Wiser, also some indication that the Wiser hub was connected as OpenTherm and a way to switch it back to relay would be useful.

I will update this when I've had it going a while. It's June and the heating isn't really on.

UPDATE

I bought the EPH thermostat and replaced my OpenTherm switch with phono plugs so I could unplug the Drayton and plug in the EPH instead. And it works! I now have DHW at 45 degrees! much more civilised.


Update Update 22/10/22

Still occasional schedules appearing from no where. One person commented this seemed to happen if the controller disconnected from wifi. Have not tested it.

Radiators can be quite noisey with rushing sound, especially if only one radiator being heated. One forum recommended opening all lock valves and that seems to have improved things.


Friday 10 June 2022

Busgate victory at Malborough Place, Brighton - What you need to know

 I was fined, in feb 22, for traversing a 'Busgate' at Malborough Place in Brighton. I was delivering exhibits for an exhibition at ONCA Gallery which is in St Georges Place. I walked the route beforehand as I knew there where cameras there and decided that there was no other choice but to go through what I thought was a buslane going on from that junction. I was picked up by the camera, fined, appealed, rejected and then went to tribunal where I was successful. After my transgression I found there is a route you can take via Church Street, Tchbourne St and North Road, but my defence was it was unreasonable to expect someone to know that as the signage was misleading.The adjudicator's summary is over 2500 words long, and it's not cut and paste, he made a thorough and detailed analysis of the traffic set up there and my reasons for what I did. I would like to thank him for his attention to detail and his thoroughness. 

I will not go into the detail of Busgates here as I expect anyone who has found this page will already be acquainted with them. But if you have been fined while trying to deliver to either Gloucester Place or St Georges Place you maybe able to offer this verdict to challenge it. As the Adjudicator says, his decision applies to a particular set of circumstances.

You can read about Brighton's Busgates here. https://www.brighton-hove.gov.uk/parking-and-travel/bus-gates

I would like to say to Brighton and Hove Council how ludicrous I think it is to reroute traffic from a main road through a popular tourist area, the North Laines. I would also like to suggest they take up suggestions I made at the tribunal for signage including this at the junction of Malborough Place and Church Street. 


Here is the text of the Adjudicator summary for Tribunal number BH00284-2205

Adjudicator's reasons


1.        I have decided this appeal without a hearing. The parties did not ask for a hearing.

2.        The Council have produced footage, from a camera device approved for bus lane enforcement, which shows that Mr Weedy’s car was driven in this bus lane on this occasion. Indeed, Mr Weedy acknowledges that he drove his car in this bus lane

3.        The bus lane comprises a short section of the northbound carriageway of Marlborough Place at its junction with North Road.  The bus lane is the 4.3 metres of the northbound carriageway northwards from a point 6.5 metres north of the southern kerbline of North Road. It is reserved for buses, hackney carriages, private hire vehicles and pedal cycles at all times. A bus lane of this sort, which is a short section of bus only street, is referred to by the Department for Transport as a bus gate (and there is now a “Bus Gate” road marking prescribed in the Traffic Signs Regulations and General Directions 2016 (TSRGD) for use as part of the signage for this sort of bus lane).

4.        The practical effect of the restriction is to prohibit non-authorised vehicles from entering Gloucester Place, which is the continuation of Marlborough Place beyond its junction with North Road, from Marlborough Place. Other vehicles driving northbound on Marlborough Place must turn right immediately before the bus lane into the continuation of Marlborough Place at its junction with North Road. Gloucester Place is accessible from its southern end, but only from North Road (see the Council’s map at evidence 13). Evidently, the length of the northbound carriageway of Marlborough Place which is the bus lane does not extend so far north as to affect traffic turning left out of North Road (the side road to the left where Marlborough Place leads into Gloucester Place) into Gloucester Place.

5.        Mr Weedy explains that on this occasion he was heading to a loading bay outside the ONCA Gallery on St George’s Place in order to unload items for an exhibition he was installing there (St George’s Place is the continuation of Gloucester Place north of the junction with Gloucester Street). He had walked the route a few days before to make sure that there was no alternative route because that route appeared to be for buses and taxis only. On doing so, the signage convinced him that both Gloucester Place and St George’s Place were for buses and taxis only. As a result, he concluded that he had no choice but to use the route he took on this occasion for loading purposes.

6.        Mr Weedy notes the route he should have taken is as shown on the map at evidence 13, which the Council supplied him in the notice of rejection (that is left from North Road onto Gloucester Place and then onto St George’s Place, neither of which is, in fact, a bus lane northbound). However, he says this route can only be known if you download that specific map from the Council’s website or are a very seasoned driver in Brighton. In particular, he argues that the signage on the route he took implies that Gloucester Place and beyond is a bus lane, so that there did not appear to him to be a route from North Road to the loading bay in St George’s Place. He explains this is why he concluded that, although the road system leading to the loading bay was for buses and taxis only, it may be used to access the loading bay which could not be accessed in any other way.

7.        This is, therefore, an unusual case because Mr Weedy candidly admits that the signage he saw clearly indicated to him that the route he took into Gloucester Place was for buses and taxis only.  Having considered the Council’s evidence I agree that this is so, save that the signage indicates the route is reserved for buses, taxis and cycles at all times. I note Mr Weedy suggests a “Bus Lane” marking should be used for this restriction, but the “Bus Gate” road marking actually used is prescribed in TSRGD and recommended for use for a bus lane of the sort in Marlborough Place by the Department for Transport in the Traffic Signs Manual. In addition, the blue and white upright sign at the start of the bus gate is illustrated and its meaning explained in the Highway Code and Know Your Traffic Signs, so drivers should be familiar with it.  

8.        Furthermore, it is evident that, contrary to what Mr Weedy thought at the time, there is a route to St George’s Place without going through the bus lane.

9.        Nonetheless, Mr Weedy’s case is that the signage created the misleading impression that the route which was subject to this restriction was Gloucester Place northbound from the junction with North Road (rather than just a short section of Marlborough Place before the start of Gloucester Place). He argues, in essence, that as a result it was reasonable for him to conclude that there was no route, even from North Road, which did not entail driving in a bus lane to get to the loading bay in St George’s Place, so that by implication using the bus lane must be permitted to access that loading bay.

10.        Mr Weedy has been consistent in his evidence that the purpose of his journey was to unload items at ONCA Gallery on St George’s Place.  He has provided an email from the gallery’s curator confirming this. I have established from Google Maps and Street View that the gallery is on St George’s Place and that there is a loading bay outside it. I accept, therefore, that the purpose of his journey was to get to that loading bay to unload his vehicle.

11.        It is also evident from the Council’s map that the only permissible way for general traffic to access St George’s Place, and so the loading bay Mr Weedy was heading for, is by turning left from North Road into Gloucester Place and then driving northbound along that road and into St George’s Place. The Council’s map indicates that general traffic cannot access the northern end of St George’s Place. The Council’s evidence indicates that this is because a short section of the southbound carriageway of St George’s Place at its northern end is also reserved for buses, hackney carriages and private hire vehicles only (this is the same restriction as applies to the northern end of the northbound carriageway of Marlborough Place). The map also indicates that there is no other route to St George’s Place (and I have confirmed from Google Maps that this is right because Gloucester Street, the side road shown on that map at the point Gloucester Place leads into St Georges Place is a one way road in which traffic can only head away from the junction of those two roads).

12.        As a matter of fact, therefore, the loading bay on St George’s Place outside the ONCA gallery is sandwiched between two bus lanes: one at the very end of the southbound carriageway of St George’s Place and one very close to the end of the northbound carriageway of Marlborough Place. Whilst as a matter of fact general traffic can avoid the latter bus lane by turning onto Gloucester Place from North Road, I accept Mr Weedy’s point that there is a sign which creates the misleading impression that the northbound carriageway of Gloucester Place is a bus lane reserved for buses, taxis and cycles at all times.

13.        The particular sign which creates this impression is the direction sign in Marlborough Place which gives advance warning that northbound traffic approaching the junction with North Road has a bus lane ahead of it. This is a map-based sign which shows the crossroads ahead (North Road is to the left, the continuation of Marlborough Place to the right and Gloucester Place is straight ahead). The sign incorporates the sign indicating a route reserved for buses, taxis and cycles only into the map. That sign is embedded in the route straight ahead after the crossroads. This serves to inform the road user that he is approaching a bus lane ahead. It is obviously intended as advance warning of the bus lane which is, in fact, close to the northern end of Marlborough Place. Crucially, however, because the sign for the bus lane is embedded into the route beyond the junction the effect is that, as Mr Weedy says, the direction sign creates the misleading impression that it is the road straight ahead beyond the crossroads (Gloucester Place) which is a bus lane at all times and that the restriction begins after the junction.

14.        The upright sign for the start of the bus lane is on a traffic island sited in the crossroads at the centre of the exit from North Road. This sign is sited prior to the lane for traffic turning left out of North Road onto Gloucester Place. From the perspective of a person approaching that sign from Marlborough Place, as Mr Weedy evidently did when he walked the route prior to driving it, it would appear that traffic turning left from North Road, which does so beyond that upright sign, enters the road to which the restriction indicated by that upright sign applied. The restriction is actually very short and so does not apply to traffic turning left from North Road, but the length of the restriction is not indicated by any signage in Marlborough Place. The upright sign at the start of the bus lane does not appear, therefore, to be inconsistent with the direction sign in advance of it which gives the impression, for the reason explained above, that access to Gloucester Place northbound from any direction (including North Road) is limited to buses, taxis and cycles only because it is the northbound carriageway of Gloucester Place which is subject to the bus lane restriction.

15.        This gives rise to the impression that the only way to access the loading bay, which is clearly intended to be accessible by vehicles generally otherwise it would not be there, from the south is via the bus lane which appears to be in Gloucester Street. It is not clear if, when Mr Weedy did his walk through of the area, he explored the possibility of accessing the loading bay from the northern end of St George’s Place. He has not made reference to signage on that route, which suggests he did not. He clearly ought to have done as it is a possible route to St George's Place (and the signage he refers to only indicates the northbound route to that road is a bus lane). Nevertheless, even had he done so it would not have taken matters any further forward because the Council’s evidence indicated he would have encountered bus lane signage indicating that only buses, taxis and cycles could enter the northern end of St George’s Place. Consequently, he would still have been left with the impression that the only way to access the loading bay in St George’s Place was via a bus lane which was signed as reserved for buses, taxis and cycles only (in which case the route he took was the obvious route because it would not involve a U turn to access the loading bay).  This is, of course, why Mr Weedy concluded that he must be permitted to use the bus lane which he drove through on this occasion to access the loading bay, notwithstanding that the signage indicates that it is reserved for buses, taxis and cycles only

16.         The only signage which could arguably have indicated to Mr Weedy on his walk through that North Road was the appropriate route is a road marking in North Road just before the crossroads (apparent in Street View images of the crossroads from August 2021) which indicates that local traffic may turn left into Gloucester Place. There is not an equivalent marking for traffic going straight on from Marlborough Place into Gloucester Place and the road marking for such traffic actually directs “Other traffic” to turn right. Nevertheless, Mr Weedy has produced evidence that there is a road marking at the southern entrance to Marlborough Place which indicates that it is a route for buses, taxis and access only. I am just persuaded, therefore, that it was reasonable for Mr Weedy to assume on his walk through, because the direction sign creates the impression that the bus lane restriction is in Gloucester Place and that traffic turning left from North Road was also using the bus lane, that vehicles were permitted to use the bus lane to access the loading bay in St George’s Place. In short because the signage creates the impression that all routes to that loading bay from both south and north involved going through a bus lane reserved for buses, taxis and cycles only, it was reasonable to assume that it was nonetheless permitted to enter the bus lane Mr Weedy drove through on this occasion for the specific purpose of accessing that loading bay. The distinction between the route to the loading bay from the south via North Road, which is permissible, and the route from the south via Marlborough Place, which is not, is not sufficiently clear from the signage because the direction sign in Marlborough Place is misleading as to the location of the bus lane and suggests it is on both of these routes.

17.        For these reasons, I find that it was reasonable of Mr Weedy to assume that, notwithstanding the signage he passed indicated that the route was reserved for buses, taxis and cycles only, that it was permissible to use that route to access the loading bay. For the reasons explained it was a reasonable assumption that it was necessary to do so in order to access a loading bay which is obviously intended to be accessible to general traffic. He would have no reason to check the Council’s website for the map since provided by the Council. He could expect the signage to adequately inform him of the restriction.

18.        This is a case, therefore, where I find that the signage is generally adequate to inform the road user of the bus lane restriction which Mr Weedy contravened in this case, but on the specific facts of this case it was not adequate to do so. The distinguishing fact in this case is that Mr Weedy was driving to a loading bay in St George’s Place and, for the reasons explained, he had reasonable grounds for concluding the bus lane was the only route by which he could do so. On this occasion, therefore, I find that Mr Weedy was not adequately informed about the nature of the restriction, in particular where it was, and so the restriction is not enforceable against him on this occasion.

19.        I allow Mr Weedy’s appeal on the ground that the alleged contravention did not occur. Mr Weedy has nothing to pay. He is, however, now aware of the bus lane and that should he need to access Gloucester Place or St George’s Place in the future he must do so via North Road.


Tuesday 22 June 2021

Mercury Playback engine suddenly unavailable in Premiere CS 5.5

 Just a quicky.. Updated my Nvidia graphics drivers today to 466.77 and the Mercury Playback engine was suddenly unavailable in Premiere CS5.5.

Eventually ran the GPUsniffer.exe which is available with Premiere and the way the name of the card appears has changed, in my case from "GeForce GTX 1080" to "NVIDIA GeForce GTX 1080"

If you change this in the cuda_supported_cards.txt file (you'll need to be administrator) it will work again.

Why do they do these things!

Sunday 21 February 2021

Blender eeVee GPU graphics card memory usage and what to do if you run out! Slow renders!

 I have 6 machines I can render on: one has a GTX1080 8GB graphics card, one a GTX1660 super 6GB, three have GTX1060 6GB and one a GTX970 4GB graphics card (see then note at the end about this card - it's really only 3.5GB!).

I was rendering  a scene with Farmerjoe using all six and I noticed a few of PCs were taking a lot longer than the others. Normal render time for a GTX1060 was 10 seconds but these were taking well over a minute. The 1060s were doing it at certain points in the animation but the 970 was doing it all the time.

The scene I was rendering had suddenly got bigger, I had duplicated everything in it twice (I did have reasons) and now I was having the problems. The thing was, nothing in the scene had very big geometry. I reduced a few textures that I had unwittingly made too large. But no good. As I had duplicated the scene by duplicating collections I could turn them off. And that fixed the problem. But I was interested in what was contributing the most to the problem and from what i read Graphics card memory (or the lack of) was probably the problem.

There are not really any good tools for looking at how memory is allocated in graphics cards and the only tools you have are the TaskManager in Windows (GPU view) and the Linux command 

watch -n 2 nvidia-smi

where I am guessing the number is how often it polls the graphics card. I set it to 1.

The 'VRAM' number presented in the Status Bar of Blender is pretty useless because the graphics card memory only fills up when you actually render. The render window offers a 'Peak Mem' but this is system memory so not useful either.

TaskManager on windows disables screen shots so here's my phone camera. First image is blender open but not rendering.

Second image is with Blender rendering

This is an 8GB card and as you can see a 4GB card would be struggling here.

My GTX970 4GB is in a linux box so I can't use taskmanager.

Using my Nvidia-smi command for non rendering I get this

Not much graphics memory.

Then next we have with a scene about as big at the card can render. Notice graphics memory is up to 3120 MBs and power is 139watts. The card is working hard and the scene renders quickly


Finally if I increase the size of the scene we can see that the graphics card is not really used. It must switch to using the CPU. GPU memory has dropped considerable and its using 80watts. This is compared to 13watts when idle, so it's doing something, but not as much and the render time is maybe 8 times longer.


So what to do? 

After a lot of playing about removing geometry I finally realised it was lights that were causing the problem.

For this blog I had a scene that rendered within the 4GB limit: 3315MBs, I removed 4 point lights and the card used 2928MBs. So roughly 100MBs per light. Checking my scene that wouldn't render I had 36 lights so if this calculation is true it is not suprising; at least 3.6GB for lighting alone.

The highest memory usage I got from the 970 4GB card by switching lights on and off was 3411MB so it looks like it has a 500MB safety buffer. Total memory on the card reads as 4024MB. [UPDATE: and I was right. Read this article as it explains why it's only 3.5GB!  https://wccftech.com/nvidia-geforce-gtx-970-memory-issue-fully-explained/ )

Switching lights on for render but setting them to 0watts has the same effect as disabling  them. Turning them back on even to just 100mW causes the memory problem to come back.

You can't animate the 'disable in renders' button. So animating the lamp to 0w when your away from it looks like the best option. And if you link copy a group of lamps local to each other you can animate them in one go.

Nice to know I don't have to restrict my geometry, I just need to be more clever about lighting and my project is back on track.


Hope this was useful. L


Thursday 28 May 2020

Updated! The fabulous webcam with no name and improving its terrible audio - unbranded chinese webcam 1080p

[Jump to the end to see the easier, cheaper and less likely to damage the device solution!]
 
So it was the beginning of the lockdown, and having previously said I would never want a webcam attached to my main computer, I suddenly wanted a good webcam: to be able to share my desktop on Zoom and use stupid Snap Camera filters.

But being Lockdown, branded webcams were going for stupid money; used webcams going for double the retail price and no retail stock available. So what about an unbranded Chinese one?! Difficult to do research on something that doesn't have a name, but the following one kept being mentioned as being incredible for the price. It seemed to have been branded as Aniva or Lovebay or no name at all.

It looks like this


Then I watched this video from the 'CrazyWoolTech'


This is a great video and the tests the kid does are just the tests I would do, so cheers for that.

From these tests the above camera came out top for video so I ordered one and was very impressed with its 1080p video at 30 fps. The microphone was terrible!

It is 1080p (there is an old model with 720p - don't get that one, looks the same), has a fixed focus lens which you can turn to focus. A light to show its powered and a green light to show its being used. The 'stand' (for want of  a better word) is good, decent weight and strength and has a tripod fixing hole. You could stand it on it's own on the stand like this. The manual is quite light weight but useful.


The following is how I replaced the microphone capsule for a better one. If you want to do this you do it at your own risk. I am not responsible for any damage you do to your webcam, your computer, your house or possessions, your body or anyone else or their stuff. It's just a guide of what worked for me.

Also you don't need to do this mod. You can just use another microphone, which is probably a better solution, but I fancied having a go.

Its easy to pry off the front of the webcam with a screwdriver.


The microphone is on the pcb and is at the bottom of a plastic tube (which may, in itself, account for why it sounds so bad). But I had already ordered a mic on eBay. I thought that parts used by Apple would probably be pretty good and had found someone selling 2012 Macbook pro mics for about £4.

The mic comes with a screened cable and connector.

I cut off the connector. The black wires are negative and screen so I joined them together. The mic is an electret condenser so the grey wire will carry a few volts. Its important to get the polarity right when connecting to the webcam or you could damage things.

Despite removing the screws I found the pcb did not want to come out without a struggle. So I left it in and removed the microphone capsule by rocking it back and forth until the legs broke.


(Though I did get the board off on another camera - pcb courtesy G. Finzi)

I had decided to have the new mic hovering in the air above the webcam on its cable so drilled a hole in the top and started the delicate process of soldering the microphone connections to the board.


The mic capsule removed showing polarity

Be careful not to short them together - this is quite tricky and not for the unexperienced.

The finished item looked like this:


And the audio was much better if still a little quiet. Had to put it on full volume on Zoom.

Final notes:

I have done a couple of these. Although they have the same PCB only one worked with a MAC properly. For the one that didn't work with a MAC, it was the microphone that didn't work: OSX just couldn't see it. Interestingly the one that didn't work with a Mac worked well with Snap Camera, whereas the one that did work with the Mac was laggy with Snap Camera. Probably a firmware thing but seeing as there is no mention of board or manufacturer anywhere it's unlikely this will ever be resolved.

Finally, make sure you set it to HD on Zoom otherwise you will get laggy video and glitchy microphone. I also found that on OBS studio the camera would be very laggy unless you set it to MJPEG compression. Have fun!


UPDATE!
So how good is the microphone that comes with it you may be asking?
Actually it's pretty good and so I tried and experiment as a I was begining to believe that the culprit was infact the tiny hole and long tube the sound had to go to to reach the microphone.


Out of the box sound.
 
With faceplate removed

Much better so I drilled a 5mm hole where the little mic hole was

 
New hole drilled in front plate.


Tuesday 29 October 2019

Setting up a headless linux Blender Render Node or Renderer computer for Farmer Joe Render Farm

[UPDATE - instructions for Debian 11 have been added in pink. One of the main things is you can not use Mousepad to edit administrative files - you have to use nano] 
[UPDATE - instructions for Debian 12 added in orange - not much change here]
[small UPDATE 231204 - about being unable to copy linux blender install director to a windows share - Basically install it someone on the linux system (check it works) then copy using:
     cp -Lr /SOURCE/DIR /DESTINATION/DIR
This seems to fix symlink errors on a windows share )

Prelude

I'm pleased to say I will be releasing an add-on for Farmer Joe Render Farm which will work with a newly patched version of Farmer Joe for Blender 2.80 and above. This tutorial is me documenting my efforts to create a stable linux host for the render farm so that I can do it again if I need to, and also so those of you, who, like me, have little interest in Linux, can build a box that does what you want and move on to other things.

Farmerjoe is now available here https://github.com/Laurencitow/Farmer-Joe-Render-Farm

Introduction

Spurred on by a recent video showing how much faster linux can be rendering blender files I forgot previous attempts at using linux as a render node OS and had another go.

I must admit after a week of mucking about, getting this to work, I now wholeheartedly appreciate Microsoft Windows: it's stability, forgivingness and ability to heal itself. It's much, much easier to do stuff on windows when you don't know what you are doing than Linux.

That said, here we go. I was setting out to create an install of linux that would:
  • run VNC server so I could control the render node from a main, Windows computer.
  • have fully functioning Nvidia drivers for running blender (AMD? you're on your own - sorry)
  • have auto login
  • be able to share a folder from the render computer that windows can easily see and use
  • be able to see and use a folder shared from windows ... easily
  • run Farmer Joe at login
  • and finally be strong and stable 😁
The computer name and login will be the same, and the passwords will be simple and the same for all passwords on all render computers(root, user, vnc, share etc).So the system is not at all secure.

PLEASE ENSURE THE SECURITY YOU USE SUITS YOUR NEEDS. WHAT IS SHOWN HERE IS A GUIDE ONLY AND I AM NOT LIABLE FOR ANY LOSSES YOU MIGHT SUFFER IF YOUR SECURITY IS INADEQUATE.. sorry, but these things have to be said..


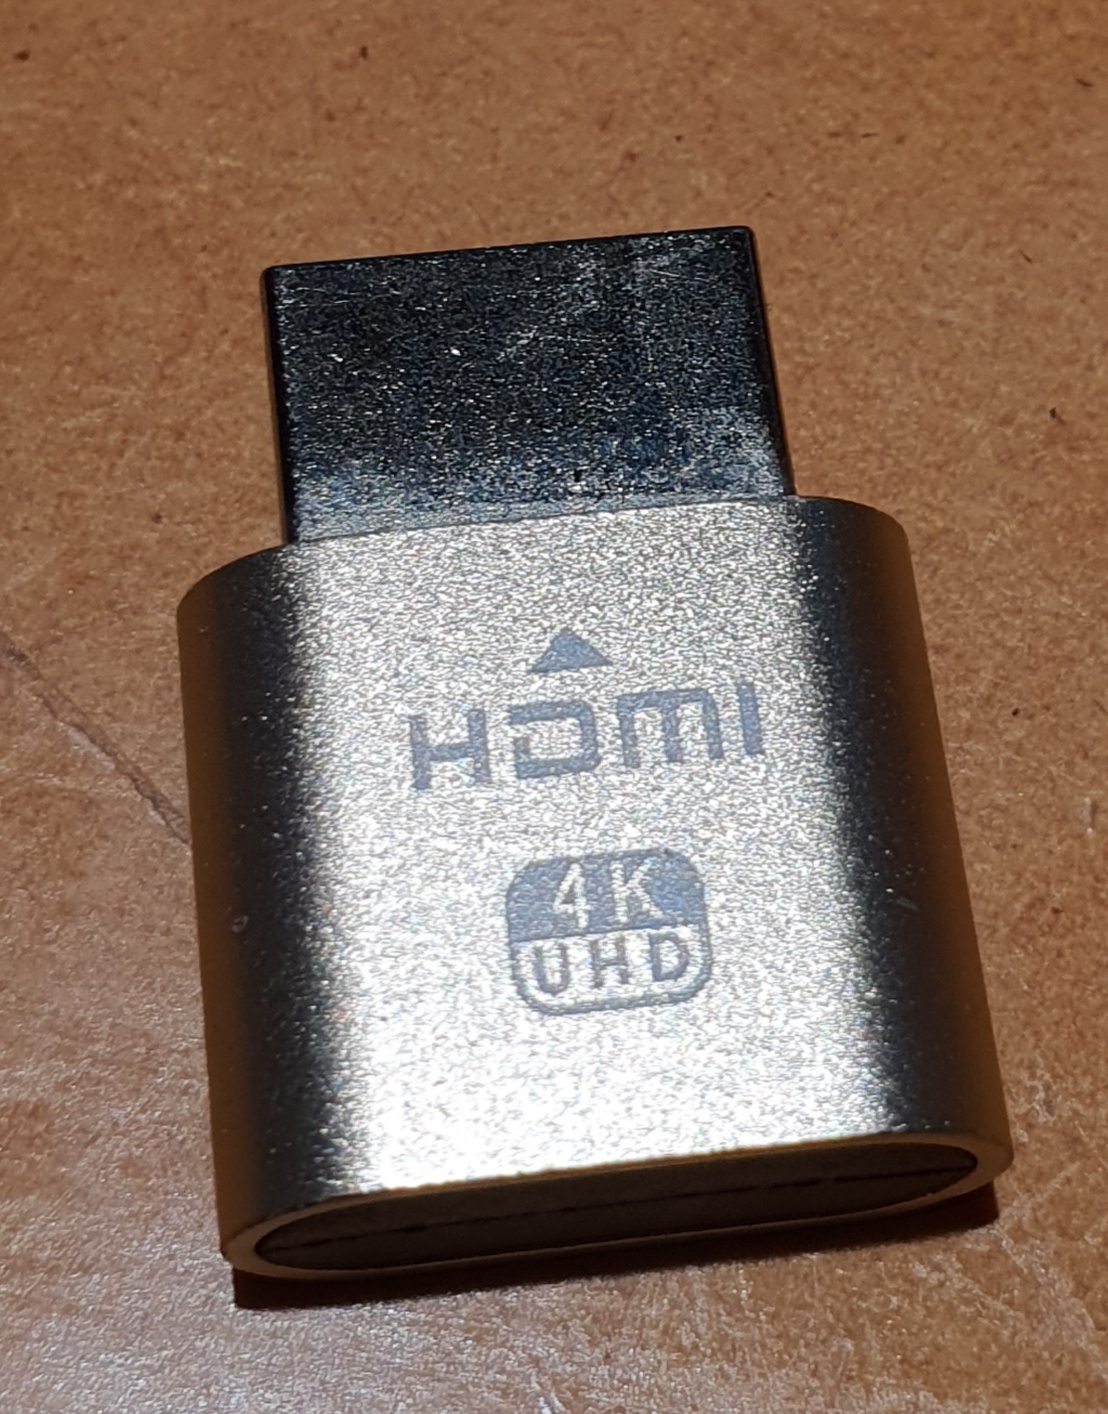
You will need a Dummy HDMI dongle to fake a screen attached (look on eBay)(assuming your graphics card has an HDMI output of course).


"1.4 DDC EDID Dummy Plug Display Emulator VGA 1080 Virtual Display Adapter HDMI"


If you are using a Windows PC to control your render nodes I recommend TightVNC viewer.

For Linux, I tried Ubuntu, Mint, Manjaro, MX and Debian Linux. Got a long way with Manjaro but found it really flakey and unreliable and in the end transferred what I had learnt to Debian: renowned for it's stability.

Debian can exist along side windows but you have to do extra steps if you have UEFI enabled on windows... not covered here so google it. Also there are problems with windows updating afterwards.

I hope I have got all the steps right in this tutorial...

*** ALSO I AM NOT RESPONSIBLE FOR ANY LOSS OF DATA YOU MIGHT SUFFER***
so be careful...


Installing Debian

(slightly updated 2021/2/12)

Download from here https://www.debian.org/CD/http-ftp/#stable and use Rufus to make a bootable USB drive. This tutorial is made with Debian 10.1.0 and used the debian-10.1.0-amd64-netinst.iso file. I have added some extra information to make this work with Debian 11 in pink. Debian 12 in orange
Boot from the USB drive on your render computer and follow the instructions. Choose Graphical Install.

You should have chosen your computer/username and simple password.

First thing you need to get right is partitioning the disk. If its the whole disk you are using then it's easy but if you want to delete a partition and use that the menu system is a bit quirky. Using the whole disk use Guided - Use Entire Disk.. Otherwise choose Manual

  • delete the partition
  • select the free space you have created
  • select 'Automatically partition free space' and then 'All files in one partition'
  • 'Finish partitioning and write changes to disk' and the next screen you have to confirm this.
  • no to a proxy (unless you need it)
  • yes to a grub drive and select the drive you system is on if there's more than one disk
During the installation you get a chance to use a more local repository (or server where the debian software updates are stored) Sometimes these local repositories are not as good as the main ones and you can get problems.

When it come software selection page:


  • select XFCE
  • keep Standard System Utilities selected
  • Deselect EVERYTHING ELSE
XFCE is the GUI interface - it's not the best or the prettiest but it does work the way we are going to use VNC.

Your computer name is the same as your login name and all the passwords are simple and the same (at least that's what I've done)

The rest should be straight forward.

First boot and installing things

Choose the 'default panel' option in the dialogue that appears.

We are going to install things two ways: the Synaptic Package Manager and the terminal.

From the Applications button go to Settings/ Synaptic Package Manager  (need password)


Under Settings/Repositories. In the top two ticked selections, in the 'Section(s)' section make sure it says 'main', add 'contrib' and 'non-free'. (Deb 12 also has non-free-firmware )


Press the Reload button


This allows us do download the proprietary drivers

When done click OK
(if you have problems here it might be worth changing repository)

Click search on the right hand side and put in 'Nvidia Driver'. Scroll down the search results until you come to Nvidia Driver. Right click and select 'Mark for Installation'. (AMD? you're on your own - sorry)


You'll see another screen showing you all the other stuff you are going to install. Say yes. then click apply. It will take a while... its a big file to download and process. Click the 'Apply' button to install.

In Debian 11 you will also see a popup mentioning the Nouveau driver, just click ok or next and the driver will be dealt with when you reboot.

You need to add Cuda files for Cycles (which I forgot to do earlier as I hadn't tested cycles.)


Search for 'cuda'. You need the nvidia-cuda-dev and nvidia-cuda-toolkit. The other items in green will be included with these.

UPDATE - Not tested as I can't be bothered to take the card out of my main machine. If you're lucky enough to have an Nvidia RTX card you will want to instal OptiX so you can render cycles even faster. Also not tested yet if some machines have RTX and some GTX. a work in progress. 

Again not tested, search for OptiX and select 'libnvoptix1'

Try this if you get stuck - https://ingowald.blog/installing-the-latest-nvidia-driver-cuda-and-optix-on-linux-ubuntu-18-04/#:~:text=Once%20driver%20and%20CUDA%20are,driver%2C%20CUDA%2C%20and%20OptiX.


Next while we are in Synaptic Package Manager search for 'TigerVNC'.
 You need these packages.


Finally search for 'Numix' and add the Numix icons. The default restart icon looks like a medieval diagram of a stomach. Numix is more intelligable.


When done open XFCE Terminal from Applications.
Type 'vncserver'
You will be asked for a password. Type the password you are using for everything and confirm it.
It will ask if you want a 'view only' password... I would say 'No' or 'n'

Before we go any further you might want to add 'Restart' option to the 'Action Buttons' (top right hand side) and move the 'Action Buttons' to the left hand side and add the Numix icons (Settings/Appearance/Icons). 

 Right click on the right hand most 'button' marked with your username and select properties. Change to Session Menu to Action Buttons. Untick everything except shutdown, Logout and tick restart. We would get rid of logout you will need it to finish off later. You can move some separators to make it look nice.

Right click on your new Action Buttons and select Panel then Preferences and then Items. You can move things about on the top bar. Make sure your Action Buttons are now on the left hand part of the screen in case of screen shrinkage. If your VNC window is smaller than your actual window you won't loose the restart and shutdown buttons if they are here.


It's a bit clunky and I'll leave you to figure it out but you might end up with something like this.

For the icons go to Applications/Settings/Appearance and choose the Numix icons. Now your restart button doesn't look so stomachy.


You might want to add the handy CPU monitor too!


Important - switch off all power settings.. if the screen goes blank.. it will stay blank
Applications/Settings/Power Manager. When power button pressed to Shutdown (may be useful oneday). Make sure system and display are set to 'Never'.

Installing networking stuff

With terminal still open we can install networking stuff.
For some reason the 'SUDO' command does not do what I'm used to in Debian so we use 'su root'.
Typing 'su root' in the terminal is the same as opening the command prompt as an administrator in Windows. After you've typed it and put in the password you are root administrator.

Installing Samba (Networking):
type -      
apt-get install samba
and type 'y' for yes if prompted.
When asked about WINS select yes. (Didn't get asked this in Deb 12)
when done type -
apt-get install samba-client
This looks after linux shares.
apt-get install cifs-utils
For mapping windows shares 


While we are here lets add Gparted (partitioning software) because it's useful:
apt-get install gparted

Finally we are going to set the render computer to auto logon.
Still as su root, type: (Debian 10)
mousepad /usr/share/lightdm/lightdm.conf.d/01_debian.conf

In Debian 11 we can not use Mousepad and we have to edit a different file so the line is

nano /etc/lightdm/lightdm.conf

(Debian 10) in the terminal there will be loads of warnings because they don't like you using mousepad but we don't care. Mousepad text editor will open. There should be some configuration stuff in there already (if there isn't you've made a typo in the above line). Add these lines to the bottom where USERNAME is your login and computer name.

[SeatDefaults]
autologin-user=USERNAME
autologin-user-timeout=0

 Save and exit mousepad and type 'exit' in terminal to exit root.

(Debian 11 and 12) The lightdm.conf file we have opened already has the entries we want under [Seat.*]

uncomment

autologin-user=USERNAME
autologin-user-timeout=0

and set the username to your username 

Launch Synaptic Package Manager again and search for GVFS (this does the searching the windows network niceness)
scroll down - you need to add gvfs-backends, gvfs-fuse and gvfs-bin

Debian 12 GVFS-bin seems to be missing from the list


Close Synaptic Package Manager

I think now is a great time to reboot. And hopefully your computer should log straight in.


When it boots up I would load this tutoral on the webrowser in your render node so that you can easily copy some of the scripts that follow.

Configuring VNC


Unlike Windows, VNC on linux does not necessarily give you what you see on the screen. Perish the thought! You can have many different VNC connections to many different virtual screens. What is difficult is getting it to show you whats on the actual screen and as we are using Blender this is important that we do. (Just trust me here). So we use a much maligned TigerVNC feature: the X0vncserver. And this shows you the actual screen and (with Debian anyway) behaves well with the Nvidia drivers.

At the moment you will be plugged into a monitor and you probably won't want your VNC window to be as big as the monitors default resolution. X0vncserver will probably crash if you change resolutions with it running so we have to set this first. It's complicated by the fact that your HDMI dummy dongle you will be using to replace the monitor has more resolutions available but more of that later.

We can set the display resolution in Applications/Settings/Display. Let's choose 1440x900

This is the command we will be using for VNC

x0vncserver -display :0 -geometry 1440x900 -rfbport 5900 -passwordfile /home/USERNAME/.vnc/passwd

In Debian 11 we have to add -localhost no to the line:

x0vncserver -display :0 -localhost no -geometry 1440x900 -rfbport 5900 -passwordfile /home/USERNAME/.vnc/passwd


I have found it necessary to have the resolution in the command otherwise things go wrong. So if you change the resolution again you will have to change it in the x0vncserver command. I have found that when using the Dummy HDMI dongle X0vncserver is less likely to crash if you change resolution.

You can configure x0vncserver as a service but we are going to use the Applications/Settings/'Session and Startup' app to do it because its easier. Go to 'Application Autostart'. Create a new entry called VNC and paste the above command into the command field.

u

If you reboot the render node x0vncserver should be running at startup and you should be able to connect to it from you PC. You will need the password. When you are connected  you can click the disk icon in the top left hand corner of the window and save the connection information to the desktop. It will then ask you to save the password too!

Networking

Having already installed all we need its time to configure.

Shares are shared using the Samba smb.conf file which lives in /etc/samba.

Drives are mounted in the fstab file which is located in the /etc/ directory.
To add a little more detail here, and especially in Debian where extra hard disks are not automatically mounted, we create a folder in the filing system and mount the drive as if it appears in that folder. So in windows we sort of mount a drive to a drive letter, in linux we mount it to a folder name. And the same is true if we are mapping a shared drive from an existing computer.

Mounting drives with fstab

It is important to mount a drive before you share it for obvious reasons. To mount a hard drive within your computer, or another partition on the system drive we need to know it's UUID.

First run Gparted which we installed earlier.
Applications/System/Gparted. Each disk and partition have a code. The first disk is usually SDA and the second SDB and each partition a number so the third partition on the second disk is SDB3.

Note down which one you want to mount.

In terminal run:

ls -l /dev/disk/by-uuid/

The blue number/letter codes are the UUIDs of the partitions on the disk. Identify the one you want from the SDxx code in yellow at the end of each line and copy it (just the blue) to the clip board. For me sda2.


Type 'su root' to become an administrator and type 'mousepad /etc/fstab' . There should be enteries in there already or you have made a mistake.

For Debian 11 use nano - type 'nano /etc/fstab' .

Make a comment to indicate what you are adding. The Hash key does not work for some reason so you will have to copy it from another line.


I am going to add this line:

UUID=01D57AE18561B120   /media/data    ntfs    defaults    0    0


 where /media/data is a folder I have created in the media directory to map the drive. ntfs is the file system. Linux supports many. Defaults are the options and the two zeros are 'dump' and 'pass' what ever that is. The spaces are tabs.

Under the latest special linux rules. Permanent drives are mapped to /Mnt/ and removable drives are mapped to /Media/.

(If we want to make a folder to map to - say /media/renders we will need to do in terminal as root with mkdir /media/renders ). Any folders/files outside the users home directory are root permissions only and require 'su root'. If you want to see the whole filing system go to the File Manager and look at File System.


If we want to add a windows share from another computer as a perminantly mounted drive then..

(note.. if this doesn't work there is a way round it later on) To expand on this I have found that usually the network drive has not been found when this is run so it is better to add this as a delayed Cron job described later. I have kept this in just for completeness)

//SERVER_IP/SHARENAME   /media/MOUNTDIRECTORY  cifs    auto,nofail,x-system.device-timeout=10,username=USERNAMEOFSERVER,password=PASSWORDOFSERVER,uid=1000,iocharset=uft8   0 0

UPDATE

apparently in CIFS v6 and later you need to include the 'domain' which in my case will be the windows workgroup so the entry will look like this

 //SERVER_IP/SHARENAME   /media/MOUNTDIRECTORY  cifs    auto,nofail,noperm,x-system.device-timeout=10,username=USERNAMEOFSERVER,password=PASSWORDOFSERVER,domain=DOMAIN, uid=1000,iocharset=uft8   0 0

This also adds 'noperm' which helps us to be able to write to a window share. Just found what looks like an error in this.. lack of comma between nofail and noperm.

I found with this i didn't need the stuff with Cron  job later.

Debian 12 - this part always seems to need a lot of mucking about. In the end I have both the fstab entry and the Crontab job and the share mapping works.


Spaces inbetween are tabs.

If the share isn't present at boot time then the computer will take a little longer to boot

You can use a hostname as long as the computer can resolve it, you should use static ip addresses really though DHCP computers tend to keep their ip addresses. The UUID here should be unique if you add another share and you can get a UUID generator program.

The username and password here are for the windows box you are sharing from so you may not wish to include the password depending on your situation. There are other more secure ways of storing passwords to shares not covered here.

Save the fstab file. and exit 'su root'. If you have made a mistake then... BOOOOOOMM!!! you'll be pluging that monitor back in again.

Reboot and check to see if the share is mapped to the mount position.

If the share has not been mapped try   mount -a   in terminal as root (this reloads the fstab file). If you get an error you might have to start from scratch again as there is obviously a problem with networking.

If it does map with is command it could be that your computers hardware is slower to get the network stuff up and running and not ready when fstab is run. In this case we need to do something else.

If the FSTAB mapping fails

We can not use mount -a as it only gives us read only permissions.. so

Firstly we're going to create a handy place for some scripts. In the users home directory create a folder named 'scripts' using the File Manager and in it, right click, and create and empty file called startup.sh

then in terminal in as root type chmod +x /home/USERNAME/scripts/startup.sh and this will make the file executable.

edit the file in Mousepad or nano as follows:

!/bin/sh
mount -t cifs -o username=USERNAME,password=PASSWORD,uid=1000,iocharset=utf8, file_mode=0777,dir_mode=0777 //SERVERADDRESS/SHARENAME /media/MOUNTNAME

(note: there should not be a space between the 'utf8,' and the 'file_mode' or it won't work)


and save. Now in terminal as root type
crontab -e and if it gives you a choice select 'nano'
cursor down to the bottom of the file and type

@reboot sleep 10 && /home/USERNAME/scripts/startup.sh

type 'Ctrl X' and they 'y' and return to save.

the number after sleep is how long after boot it will try and map the share. I found 5 was too short so settled for 10. You may need to experiment leaving a margin for error.


Sharing things with smb.conf

I wasted many hours trying to come up with a simple way of sharing things from Linux. In the end I used this smb.conf from user Adriano P on Serverfault.com who offered this example.

[global]
workgroup = WORKGROUP
server string = Samba Server %v
netbios name = COMPUTERNAME
security = user
map to guest = bad user
dns proxy = no
#============= Share Definitions =================
[NAME_OF_SHARE]
force user = USERNAME
path = /home/USERNAME/renders
browsable =yes
writable = yes
guest ok = yes
read only = no


This entry in /etc/samba/smb.conf will share the 'renders' folder in the user's home directory WITHOUT asking for any username or password. There were some 'tutts' from other users about security in the thread but this is what I want. If you want security there are plenty of examples on the web. You can add as many shares as you like by copying and renaming the [NAME_OF_SHARE] section.

To set up this file. 'su root' in terminal and type 'mousepad /etc/samba/smb.conf'. There will be an existing file which I suppose you should back up. Then after deleting all the entries from the old file, type or paste the above changing the words in Capitals to your own values and save as smb.conf.

On reboot you should be broadcasting your shares and you should be able to see them in windows.

  Misc

If you want you can remove libreoffice because we don't need office on here.

apt-get remove --purge libreoffice*
apt-get clean
apt-get autoremove

FarmerJoe

To be a render 'node' in a Farmer Joe render farm you will normally use the .sh file as the .pl is there if you want to develope the software further.
 
If you want to run the Farmer Joe perl script use Synaptic Package Manager to install libyaml-tiny-perl and libio-compress-perl.

If you want to compile your own .sh from the perl script you will need, in terminal root, apt install libpar-packer-perl


You will have mounted the share that Farmer Joe resides on as something like /media/renders and the FarmerJoe.sh file or perl script (.pl) will be in the root.

We want to run this, at boot, after the share has been mounted and in a terminal window.

The only way I have found to do this is as follows.

We are going to make another .sh file in our 'scripts' folder (more details in the 'If the FSTAB mapping fails' section). If you haven't made the 'scripts' folder make one in /home/USERNAME/ and in it make an empty file 'fj.sh'.

In terminal as root they chmod +x /home/USERNAME/scripts/fj.sh to make it executable.

Edit the file in Mousepad or nano and add the lines:

!/bin/bash
sleep 15
xterm -e /media/MOUNTNAME/farmerjoeXX.linux

or .pl if its a pl script. Here sleep should be a bigger value than the one set to map the share if used. 15 should be fine.

Deb 12 - xterm doesn't seem to work - use xfce4-terminal instead.

 
For the master computer where you are running a master, node and webserver you can use the line:

xfce4-terminal -T Master -e "/media/renders/Farmerjoe.pl --master" --tab -T Node -e "/media/renders/Farmerjoe.pl" --tab -T Webserver -e "/media/renders/Farmerjoe.pl --appserver" & 

This will put them in three tabs in same window. xfce4-terminal has a bigger font by default 


You can open a web browser on the Farmerjoe webpage with xdg-open http://IPADDRESS:2007


Fun fact!

You can do the same in Windows with marvellous ConEmu like this and start it all up with a hotkey

ConEmu is open source and can be found here https://conemu.github.io/

 UPDATE - I have had some problems with this configuration of Conemu since April. If you fix it please let me know - seems to have righted itself now.


Finally, in 'Applications/Settings/Session and Startup' add a new entry in 'Application Autostart', as we did for VNC, called 'Farmer Joe' and give it the command line:

/home/USERNAME/scripts/fj.sh


  Preventing sessions from being restored

Normally it does not bother us if windows reopen as they were when we log in, but with FarmerJoe we can end up with dead windows from before with new windows from out startup file.

XFCE makes damn sure your session comes back when you reboot so it's hard work stopping it. You have to do three things.

First press logout
and uncheck 'save session for future logins'.

Then in 'Settings/Session and Startup' make sure 'Automatically save session on logout' is unchecked.

then, still in Session and Startup go to the 'Session' tab


and with all other windows closed press clear saved sessions and close 'Sessions and Startup' and cross your fingers :)


And reboot..... and good luck - if the Farmer Joe drive is available and mapped you should be running as a NODE.


Finally


If you run into problems I would seriously consider starting again from scratch. It will be faster in the long run.

Conclusion

I was very disheartened in the beginning. I think this is my third attempt at doing this. What appears to be an easy thing to accomplish turns out to be very difficult if you don't have a good knowledge of Linux. And what I have created seems to work well and be robust.